Manual Dross Pumping Best Practices
A manual dross pump, as compared to a fixed position dross pump, is a pump system that can be manually maneuvered around the zinc pot to remove or dredge the bottom dross. Manual dross pumps are typically used during regular maintenance cycles, while fixed position dross pumps operate continuously to remove top dross. Manual dross pumps are often used to supplement fix position top dross pump systems.
Using a manual dross pump is not the same as using a vacuum cleaner, although there are some interesting comparisons (which I will leave up to the reader's imagination.) In this post, I will discuss some best practices for zinc dross pumping.
Why pump dross? It's all about zinc pot downtime. Dross pumping is the fastest way to return a zinc pot to service. The alternative to pumping out dross typically involves clearing the fixturing above the zinc pot and using a scoop or strainer assembly to dredge the entire zinc pot. This technique tends to stir up the finer dross components and leave them in suspension. As a result, the pot must be allowed to settle for hours to ensure the residual dross has returned to the floor of the pot prior to processing new materials. With dross pumping, it is often the case that it can be done without reconfiguring the fixturing around the pot AND the pump draws in the fine dross out of the pot so normal operation can be resumed quickly. Rather than a full shift of downtime, the pot can be returned to service in less than an hour, easily offsetting the cost of the dross pumping systems, spares, and consumables.
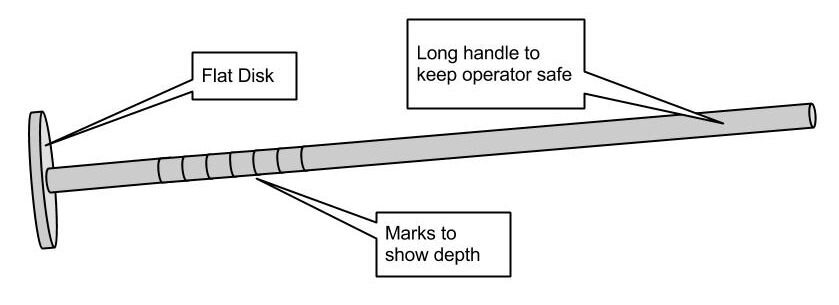
When preparing to vacuum a room, we would typically assess the condition of the room first and remove obstacles that might damage or clog the vacuum cleaner. It's no different with dross pumping, except that the potential obstacles are hiding under a layer of molten zinc. To "gain visibility" into what is hiding under the zinc, we recommend using a probe similar in design as the one shown below.
The probe is manually inserted into the zinc and used to assess the following:
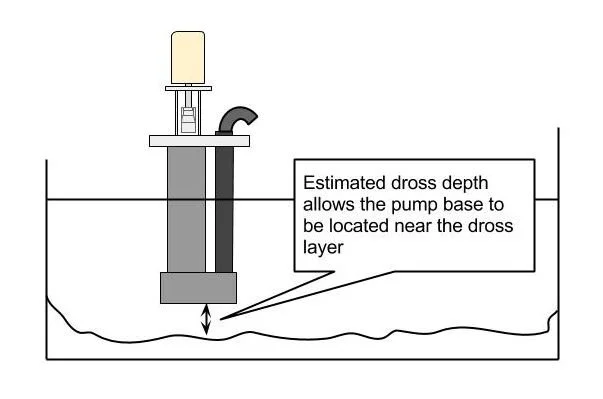
Plot the depth of the dross throughout the melt - Dross tends to accumulate in corners or below eddy currents. It is essential to know where the deeper and more massive accumulation of dross is so that these areas are received extra attention. The marks on the probe pole can be used to estimate the depth of the molten metal above the accumulated dross. This knowledge will help reduce the likelihood of overwhelming the dross pump.
Determine the granularity and texture of the dross - Dross is not always "silty" but can become crusty or hard. Pressing the disk of the probe down into the dross will help you determine it's characteristics.
Locate and remove big/hard chunks - While more common in first-time dross pumping situations and less frequent with routine dross pumping, large hard pieces of dross and foreign objects can pose a serious problem. It is not uncommon for random bits of hardware like nuts and bolts to find their way into the melt during routine maintenance, etc. These chunks could damage the pump's impeller and base volute during dross pumping operations and are to be removed manually.
While it might seem obvious, dross must be "flow-able" to be pumped without problems. Probing the dross will help determine it's flow-ability and the required pump placement:
Soft and easily flowable - slowly lower the pump into the dross and begin pumping.
Hard dross - keep the pump base about 2 inches (5cm) above the hard dross.
We also recommend keeping spare pump components on hand for dross pumping applications, including shear pins (and wires), impellers, and shafts. In most cases, the shear pin will be sacrificed if a piece of hard dross enters the pump. In this case, removing the pump from the melt, removing the dross from the impeller, and replacing the shear pin is required. (This video will provide a better understanding of installing a new shear pin.)


